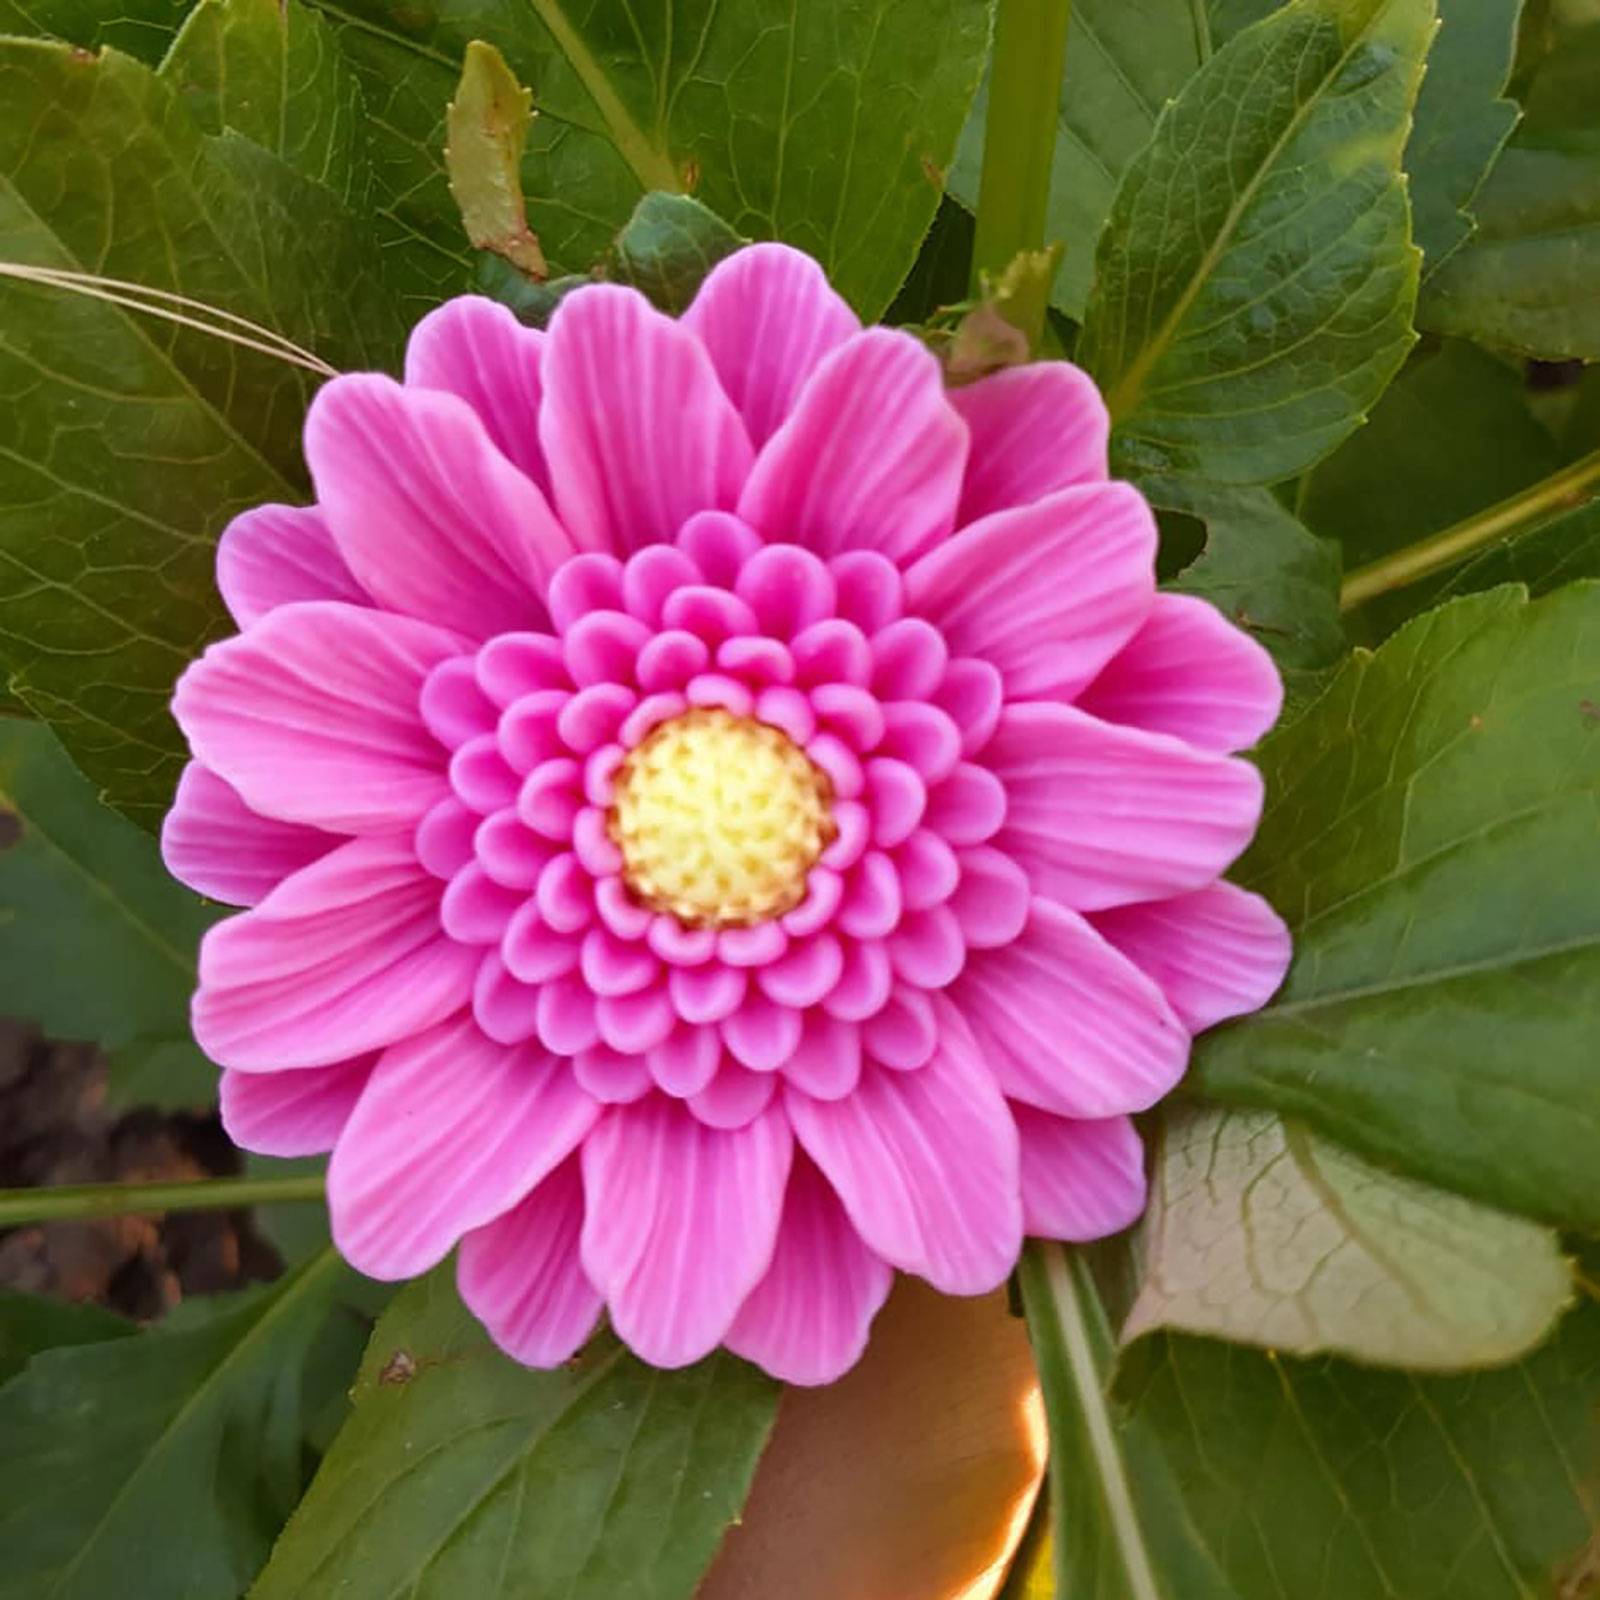
Imagine creating something so lifelike, so refined, that it immediately grabs attention. With this mould, you don't just make a product, you create an experience - whether it's soap, candles, chocolate, fragrance cubes, epoxy, or plaster. The detailed rendering of the gerbera ensures that each project becomes not only a showpiece, but also something that people will remember.
Use the Silicone Mould "Gerbera" for:
- Lifelike soaps: Create fragrant, luxurious soaps that transform your bathroom into an oasis of elegance.
- Unique candles: Create candles that not only bring light, but also add atmosphere and sophistication to any room.
- Impressive chocolate and edible art: Surprise with chocolates and edible works of art that taste as delicious as they look.
- Aromatic fragrance cubes: Create scented cubes that fill any room with delicious aromas, while looking beautiful at the same time.
- Epoxy and plaster decorations: Design unique decorative pieces that will be the centrepiece of any room, with the detailed beauty of the gerbera.
With the Silicone Mould "Gerbera" in your hands, you have the key to creating works of art that excite the senses and capture hearts. This mould allows you to create products that go beyond the ordinary and really impress.
Advantages of using our silicone moulds:
- Unique silicone moulds. 95% of our moulds are designed to our own design and are truly unique.
- High-quality materials: Manufactured from high-quality European silicone for guaranteed durability and stability in use.
- Thorough processing: Each mould undergoes vacuum treatment to extend the life of the mould and also remove possible air bubbles, resulting in a perfectly smooth surface for your creations.
- Durability and elasticity: Thanks to their sturdiness and elasticity, our moulds can withstand hundreds of castings, making them ideal for long-term use.
- Easy removal from the mould: Almost all 3D moulds have 1-3 cuts on the sides. This is necessary so that the finished product can be removed without cracks or fractures. The elastic bands provided facilitate attachment.
- Wide temperature range: Our moulds can handle temperatures from -10 to +220 degrees, making them versatile for a variety of creative projects.
- Easy to maintain and clean : Wash the silicone mould with warm water and liquid soap. Wipe off the mould or allow it to air dry completely.
Suitable for various forms of creativity:
- Making your own soap (MAL TYPE B): Create unique soap moulds that give your products a special look.
- Making your own candles (MAL TYPE B): Easily make candles of different shapes and sizes and shape your creative ideas.
- Making your own Epoxy Art (MAL TYPE A and TYPE B): Create clear (MAL TYPE A) and matt (MAL TYPE B) creations, with room for your own creativity.
- Plaster and concrete casting (MAL TYPE B): Create decorative elements for the interior with various materials.
- Patisserie Arts (MAL TYPE A): Make unique fondant, marzipan, gum paste, chocolate, gelatine, ice cream, butter, candy and add your own individuality to any dessert.
The moulds are designed to work with materials that will not become too brittle after curing. Also pay attention to the viscosity of your material. A material that is too viscous may have difficulty penetrating the most remote corners of the mould.
Consider your materials and skills when working with them.
Check out our inspiring tutorials on TikTok: Soapmaking ArinkaSoap
Do you have a creative idea? Contact us, and we'll help you bring it to life!
User guide:
- For use: Wash the mould thoroughly with non-aggressive cleaning agents.
- For casting: Secure the mould with elastic bands if it has special cuts.
- After the product has solidified: Remove the rubber bands from the mould and carefully remove the product.
- Storage: Store the mould at room temperature. Do not place heavy objects on the mould.
Making your own soap:
- Spray the silicone mould with alcohol.
- Secure the mould with elastic bands if it has special cuts.
- Pour the soap base into the mould.
- Gently shake the mould to remove air bubbles.
- - Store the mould in a cool, shady place until the soap has hardened completely (1-2 hours)
- Remove the elastic bands and carefully peel off the edges of the mould.
- Enjoy the result .❤
Making your own candles:
- Heat the chosen wax according to the manufacturer's instructions.
- Add colours and fragrances as desired and mix the wax well.
- Pierce the silicone mould with a needle and pull the wick through.
- Secure the mould with elastic bands if it has special cuts.
- Lightly drizzle the mould with olive oil or silicone spray for easy removal (if needed).
- Carefully pour the melted wax into the silicone mould, making sure the wick is in the middle (you can fix it for convenience, if necessary).
- Let the candle cool completely until it has solidified. This usually takes several hours (follow the instructions on the packaging of the wax).
- After complete solidification, remove the rubber bands from the mould and take out the finished candle.
- Enjoy the pleasant light and fragrance of your homemade candle ❤.
Note the fragility of your wax. For "complex" moulds, we recommend working with soft wax Thin and overly protruding details may break when intensively removed from the mould.
Make your own epoxy art:
- Measure the required amount of epoxy resin and hardener according to the manufacturer's instructions.
- Mix the components carefully in a clean container. Pay attention to the time indicated in the instructions, as some epoxy resins have a limited processing time.
- Add dye or gloss to the epoxy resin as desired and mix well for even colour distribution.
- Secure the mould with elastic bands if it has special cuts.
- Spray the silicone mould with a release agent to easily remove cured epoxy resin from the mould.
- Carefully pour the epoxy resin into the silicone mould.
- Use a gas burner to remove any air bubbles in the epoxy resin.
- Wait for the epoxy resin to fully cure according to the indicated curing time.
- After complete curing, carefully remove the rubber bands from the mould and remove the product. If the epoxy resin has cured well and you have used a release agent, the product should come out of the mould easily.
- Enjoy your handmade epoxy creation ❤.
Note! For a matt finish, order MALTYPE B. For a transparent finish, order MALTYPE A.
Make your own Plaster creation:
- Prepare the plaster mixture according to the instructions on the package. This usually involves mixing plaster powder with water. Add special colouring if required.
- Secure the mould with elastic bands if it has special cuts.
- Carefully pour the plaster mixture into the silicone mould. Make sure it is evenly distributed throughout the mould.
- Pat the mould on the work surface to remove any air bubbles from the plaster.
- Let the plaster cure completely according to the instructions on the packaging.
- Remove the rubber bands and carefully remove the finished plaster object from the silicone mould. If necessary, use a separator to make it easier to remove the product from the mould.
- Sand if necessary and refinish with the special product to achieve the desired look and texture.
- Enjoy the result ❤
There are no reviews yet.